
 [as occurred in Year 4 Month 3]
Dwarf (2365 point) versus Ogres (2000 point + 150 point core troop muster)
Caveat: I'm the Dwarf player, this report may be biased and my knowledge of Ogre army or rules is limited.
Background:
At the start of the year, the Dwarves landed in force and occupied large parts of the Ogre Isle of Kanesdue, taking multiple provinces from the Ogres. The Ogre's then attempted to oust the Dwarven foothold in the Fortress at the Creeping Caves. The Dwarves retreated behind the walls, which the Ogre's then bombarded for a full month.While the Ogre's were occupied battering the fortress, another much smaller Dwarf batallion had walked into the undefended Ogre capital. The Dwarves rejoice, but Ogre army is still at full strength and gunning for revenge. The Ogre's halt their bombardment, and attempt to move north to take back their Capital. The Dwarves in the Fortress at Creeping Caves sally forth and attack.
The Ogre's fight for their very empire, should they beat the larger battallion of Dwarves they will then outnumber the Dwarves in their Capital and can take it back easily. This would set the Dwarves back severely in their advance on Kanesdue.
An Ogre loss could mean the end of their Empire.
Army Lists:
Note that these army lists are chosen as a single large legal army list per Empire. The Empire then divides up the larger one into smaller banners, which do not have to be legal on their own.Ogres, 2000 point + 150 point core muster:
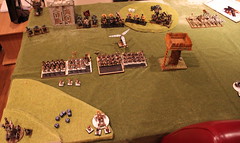
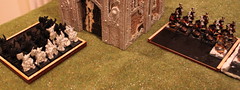
From left to right in the Deployment Picture: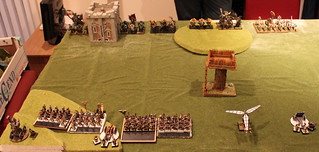
- 3 Leadbelchers
- Rhinox + Scraplauncher & 7 Gnoblars on board
- 5 Ogres, FC, GWs + Butcher
- 5 IronGuts, FC, GWs + Hero with BSB
- 3 Leadbelchers - 5 IronGuts(?), FC, GWs + Lord (=General & King)
- 5 Mournfang Cavalry
- 5 Ironguts (150 points of mustered core troops)
 |
| Mustered Ironguts on far right flank |
Dwarf (2365 points):
- 115: Thane with RoStone and MRoSpite (=General & King)- 145: Thane with BSB & Strollaz's Rune
- 351: Runelord with Anvil, MRoGromril, RotFurnace
- 440: 30 Hammerers, FC,MRoGrugni
- 420: 30 Hammerers, FC, RoCourage
- 254: 19 Miners with FC + Steam Drill
- 254: 19 Miners with FC + Steam Drill
- 120: Organ Gun - 125: Cannon with RoForging
- 140: Gyrocopter Dwarves win the roll and go first.
Turns:
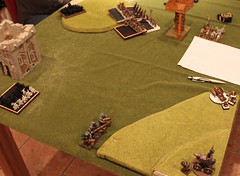
Turn 0+1a - Dwarves
Turn 1b - Ogres
 |
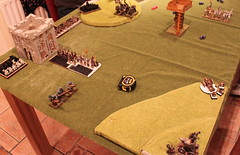
| Scraplauncher gets a hit in. |
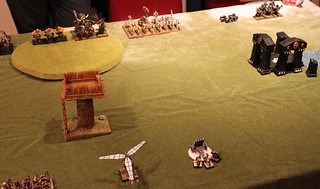
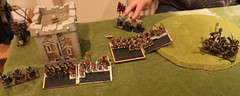
Ogres move up. Scrap launcher hits but scatters just enough, hits 6 Hammerers (one in each unit), kills 3. Butcher being near the wizards tower knows all the spells in his book. The Dwarves don't even notice the tickle of whatever was cast.
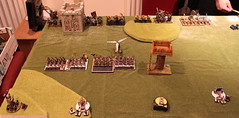
Turn 2a.1 - Dwarves - 'in which shit gets real'
- Oh noes! The Gyrocopter is in the way of Hammerers charging. He knew his duty, he went to his certain doom by charging the Leadbelchers on the right thus clearing the path for the Hammerers.
- Both units of Hammerers charge, #1 takes out the unit of Ogres with Butcher, #2 takes out the IronGuts with BSB overrunning into the Leadbelchers.
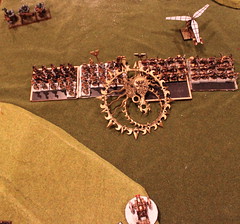
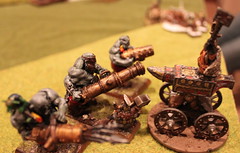
- Cannon kills a Mournfang after this shot, but fails to wound the second. The cannon ball bounces off it's flank!
- Anvil lets the newly emerged Miners charge into the back of the Leadbelchers which the Gyro is attacking.
- The Organ gun lines up the incoming Mournfang and lets loose. BOOOOM! 2 hits. 1 wound.
- Hammerers#1 fail to catch Ogres + Butcher.
- Hammerers#2 catch the fleeing IronGuts and BSB are caught, and overrun into the Leadbelchers which the Miners and Gyro are in combat with. The Leadbelchers kill the Gyro, but lose Combat Resolution fleeing the table. Miners pursue and catch them, but are off the table. Hammerers#2 also pursue
Turn 2b.1 - Ogres - 'The Mournfang Menace'
- Fleeing Ogre+Butcher rally and turn to face Hammerers#2.
- Scraplaunchers moves forward trying to escape the Miners behind the Tower.
- Leadbelchers on the left move towards Anvil and fire, causing no wounds.
- The Mournfang charge the Organ gun for it's impudence.
- The Ogre King's unit attempts to charge Hammerers#1 (on the far left) but fails and moves 3".
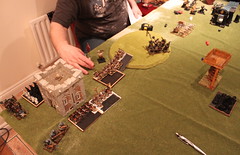
Turn 3a.1 - Dwarves
 |
| look! it's a really crappily pasted in skyline! |
Turn 3a.2 - Dwarves
Turn 3a.3 - Dwarves
- Hammerers reform to face the Ogre King.
- The Anvil hits the Mournfang with Wrath and Ruin, causing no wounds by halving their movement next turn - in the hope that they can't reach the Cannon when charging.
Turn 3b - Ogres
- Ogres Unfortunately the Ogre King fails another charge (I think this is what happened, I'm a little hazy).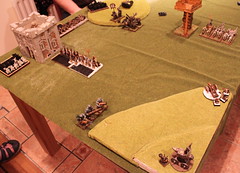
- Ironguts keep moving and firing on the Anvil, but fail to cause any wounds.
Turn 4a.1 - Dwarves - 'Kingly Kombat'
- Dwarves Both units of hammerers charge the Ogre General's unit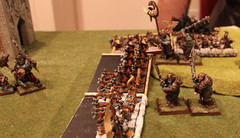
The Dwarf King challenges the Ogre King! He confidently accepts, why wouldn't he? He has an awesome weapon which allows him to always strike first!
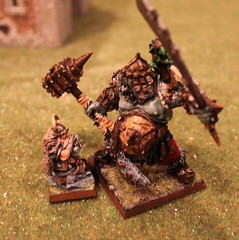
The Ogre King lines up the little Dwarf, and lets fly causing 3 wounds. The Dwarf King saves 2 with Armour, and 1 with a ward save. The Dwarf King lets loose with his own attacks, 2 of 3 hit, but both fail to wound. Meanwhile the Hammerers take their blows from the Ogre Kings unit, but then wipe it out so that only the King is left. The King needs a double 1 to pass his combat res roll, and fails.
Turn 4a.3 - Dwarves
- Hammerers beat and run down the Ogre King
Turn 4b.1 - Ogres
- You can't see them, but there's a unit of 5 Iron guts moving towards the front right unit of Hammerers.
Turn 4b.2 - Ogres
Turn 4b.3 - Ogres

Turn 5a - Dwarves
All the units are too far away to help the Anvil now, it's on it's own.Turn 5b.1 - Ogres
- Mournfang charge Anvil
Turn 6a - Dwarves
- The Miners keep moving towards the Anvil, but they already know they won't make it on time.- The Hammerers form up to take a charge by the 150 points of mustered IronGuts. They are feeling over-confident since they killed the Ogre King...
Turn 6b.1 - Ogres
- The Anvil stands (barely!).
Turn 6b - Ogres - 'a prelude to mortality'
Nice one. That's what I'm talkin' about!
ReplyDeleteI know right? I used _pictures_!
DeleteI've gone and set the standard now. I expect to see the same for your up-coming siege breakout battle against the Ogres.